Rodent droppings attic cleanup is not a one-step fix—and the order you handle each step determines whether the problem actually gets solved or keeps coming back. If you have found droppings, urine stains, or gnaw marks in your attic, you already know something is wrong. What most homeowners do not realize is that this is not just a pest problem. It is a contamination problem, an entry-point problem, and often an insulation problem—all at once.
At a glance
- Inspect first — a proper inspection reveals droppings distribution, urine staining, entry points, and insulation condition so you know the actual scope of work.
- Remove contaminated insulation — HEPA vacuuming alone is not enough if the insulation has absorbed urine and odor; removal exposes the attic floor for sealing.
- Clean and sanitize the exposed space — thorough cleaning and sanitization neutralize odors and reduce biological contaminants before any sealing work begins.
- Seal entry points, then rodent-proof — sealing gaps and penetrations stops rodents from re-entering; exclusion work follows to reinforce vulnerable areas.
- Install new insulation last — new insulation should only go over a clean, sanitized, sealed attic floor, never over contamination you decided to bury.
Why Finding Rodent Droppings Means More Than a Pest Problem
Short answer: Visible droppings are usually just the surface evidence. Underneath, you may have urine-soaked insulation, nesting debris, damaged ducts, and entry points you cannot see from the attic opening.
When homeowners spot rodent droppings, the natural instinct is to call an exterminator or set a few traps. That addresses the live rodents—but it does not address what they left behind or how they got in.
Rodent waste is not just unpleasant. According to the CDC, droppings, urine, and nesting materials can carry pathogens and should be handled carefully. The insulation itself often absorbs urine and odor, which means the contamination is not sitting on top of the insulation—it is inside it.
What Rodent Evidence Actually Tells You About Your Attic
Different signs indicate different levels of infestation:
- Scattered droppings in one area: Likely a travel path or feeding spot. May indicate limited activity.
- Heavy droppings throughout the attic: Established infestation. Insulation is almost certainly contaminated.
- Urine stains (visible under UV light): Deep contamination. Insulation has absorbed waste.
- Gnaw marks on wood, wiring, or ducts: Active damage. May need duct repair or electrical inspection.
- Nesting material (shredded insulation, paper, fabric): Rodents have been breeding in the attic.
- Strong ammonia odor: Heavy urine saturation. The insulation is compromised.
The CDC notes that recognizing signs like droppings and gnaw marks is the first step in understanding the scope of an infestation. The severity of what you find determines the scope of work required.
The 5-Step Restoration Process for Rodent Droppings Attic Cleanup
Short answer: The sequence that works is: (1) inspect to find all evidence and entry points, (2) remove contaminated insulation, (3) clean and sanitize the exposed space, (4) seal entry points and rodent-proof vulnerable areas, and (5) install new insulation only after steps 1-4 are complete.
This is not an arbitrary order. Each step prepares the attic for the next one. Skipping ahead—like adding new insulation before sealing entry points—creates problems that are harder and more expensive to fix later.
Step 1 — Inspect to Find All Evidence and Entry Points
A proper inspection is not a quick look through the attic hatch. It means examining the entire attic space: where droppings are distributed, where urine staining appears, what condition the insulation is in, whether ducts are damaged, and where rodents are getting in.
Entry points are often small—the EPA notes that rats can squeeze through gaps the size of a quarter, and mice can fit through openings as small as a dime. Common entry locations include roofline gaps, vents, pipe penetrations, utility openings, and where different building materials meet.
The inspection determines the scope of work. Without it, you are guessing at what needs to be done.
Step 2 — Remove Contaminated Insulation
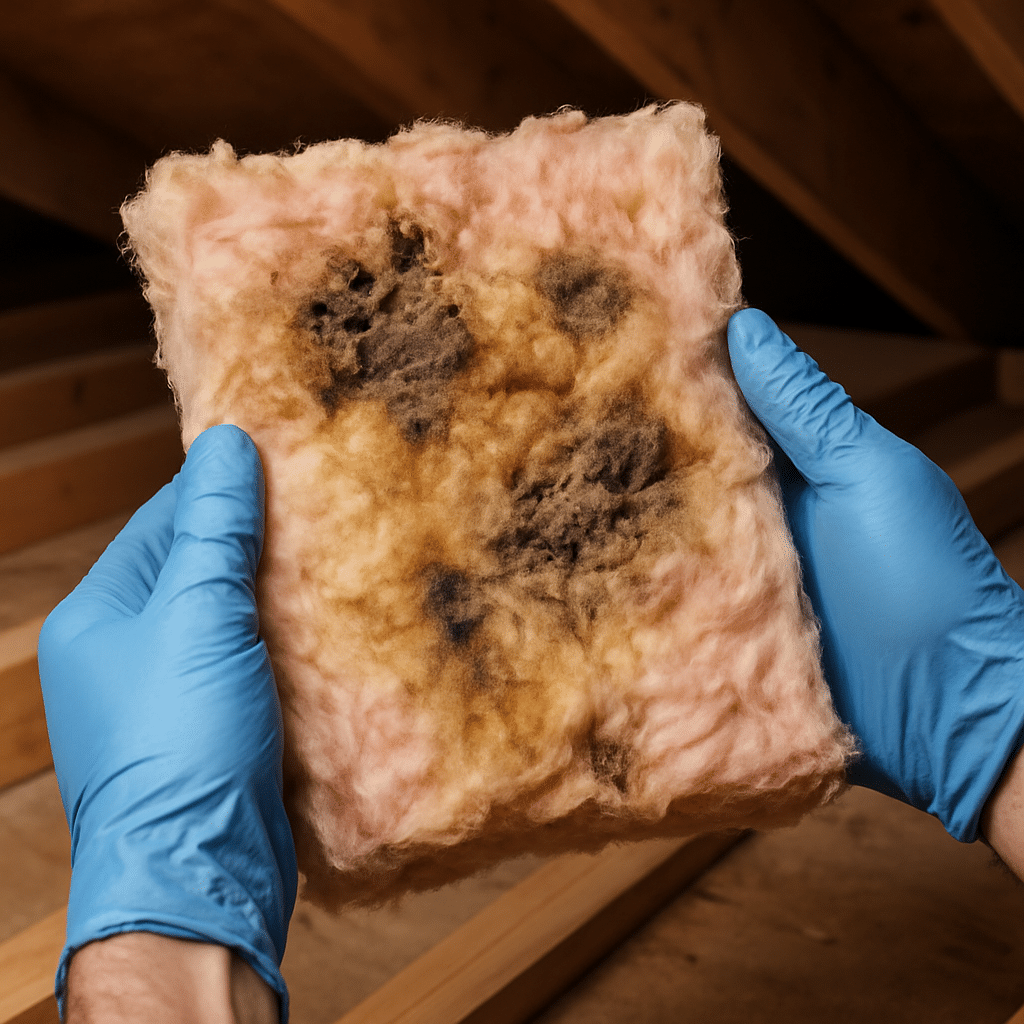
When removal is necessary: If insulation is saturated with urine, heavily contaminated with droppings, compressed by nesting, or holding odor that will not dissipate, removal is usually the right call. Surface-level contamination on top of intact insulation may be cleanable, but attic-wide contamination typically requires removal.
HEPA vacuuming alone is not sufficient if the insulation itself has absorbed waste. The contamination is not on the insulation—it is in it.
Removal also serves another purpose: it exposes the attic floor so the crew can see what is actually happening. Gaps, cracks, duct damage, and entry points that were hidden under insulation become visible. You cannot properly seal an attic you cannot fully inspect.
Step 3 — Clean and Sanitize the Exposed Attic
Once contaminated insulation is removed, the attic floor and exposed surfaces need to be cleaned and sanitized. This means HEPA vacuuming remaining droppings, debris, and particulate matter, then sanitizing surfaces to neutralize odor and reduce biological contaminants.
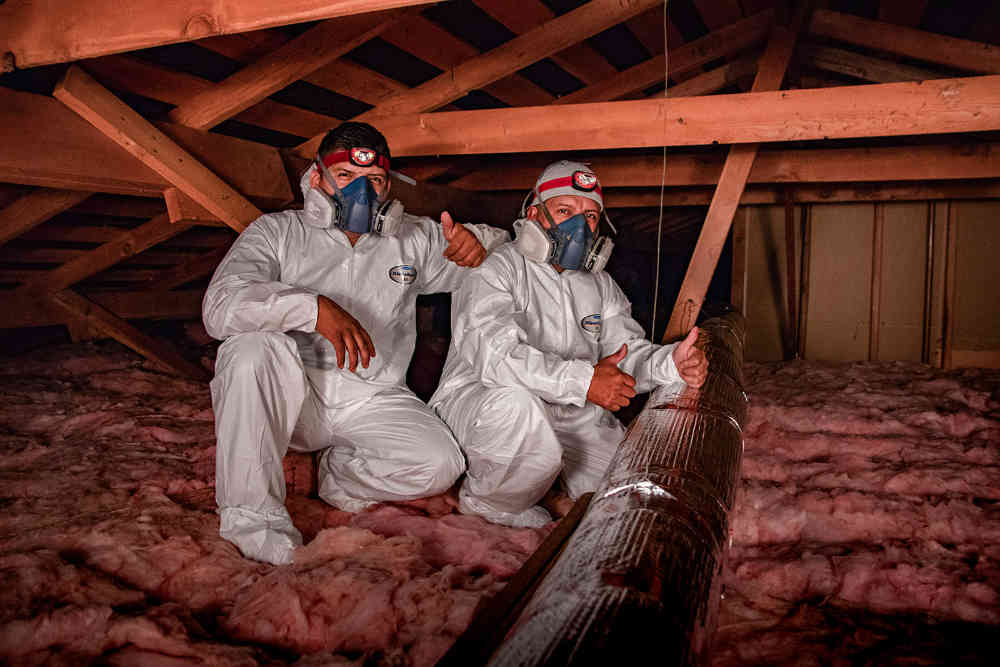
The CDC recommends specific precautions when cleaning up after rodents: avoid stirring up dust, use wet cleaning methods, ventilate the space, and wear appropriate protective equipment. For attic-wide contamination, this is not a DIY job—it requires proper equipment, containment, and protective gear.
Sanitization also helps mask pheromone trails that can attract new rodents to the same space. Rodents follow scent markers left by previous inhabitants, so thorough decontamination is part of prevention.
Step 4 — Seal Entry Points and Rodent-Proof Vulnerable Areas
Sealing is what stops the next rodents from getting in. Trapping removes rodents that are already inside. Cleaning and sanitizing remove what they left behind. But if you do not seal the entry points and reinforce vulnerable areas, you will be doing this again.
Common entry points include:
- Roofline gaps where roof meets wall
- Gable vents with damaged screening
- Soffit vents with gaps around edges
- Plumbing and electrical penetrations
- HVAC lines entering the attic
- Gaps around chimneys or flashing
- Construction openings that were never properly closed
Sealing materials depend on the opening: wire mesh, steel wool, cement, foam, or metal flashing may all be appropriate depending on location and size.
Important distinction: Atticare USA provides rodent-proofing through sealing and exclusion—but does not trap, bait, or exterminate. If live rodents are currently inside the attic, a licensed pest control provider handles removal first, then exclusion and restoration follow. More on rodent proofing services.
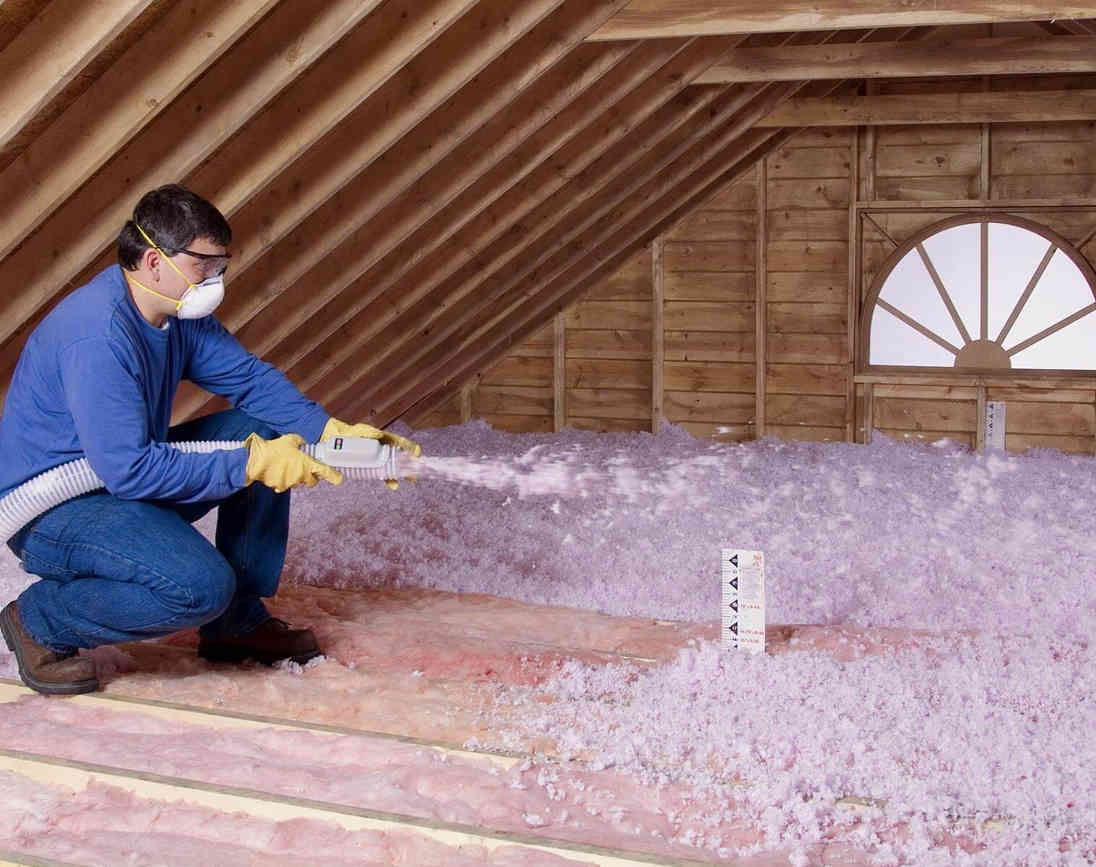
Step 5 — Install New Insulation (Only After Steps 1-4)
New insulation is always the last step. Never before.
The most common mistake homeowners make—often encouraged by contractors looking for a quick job—is adding new insulation over old contaminated material. The reasoning is that it is faster and cheaper. The result is that contamination stays in place, odors persist, and the attic floor was never properly inspected or sealed.
Air sealing should also happen before insulation. ENERGY STAR guidance recommends air sealing gaps, cracks, and penetrations in the attic floor before adding insulation, because air sealing closes pathways that allow conditioned air to escape into the attic and attic air to enter the home. Insulation works best when the attic is properly sealed first.
Once the attic is clean, sanitized, sealed, and rodent-proofed, new insulation can be installed properly—over a surface that is actually ready for it.
Why the Order Matters—And What Goes Wrong When You Skip Steps
Short answer: Doing steps out of order traps contamination, seals rodents inside, or covers problems that should have been addressed first. The most common mistakes are calling only an exterminator (no cleanup or sealing) or adding new insulation over contaminated material.
What Happens If You Just Call an Exterminator?
Exterminators trap and remove live rodents. That is their job. But they typically do not remove contaminated insulation, clean and sanitize the space, or seal entry points.
After the trapping is done, you still have:
- Droppings and urine in the insulation
- Odor that will not go away
- Entry points that are still open
- The next rodent’s path already marked
If your situation requires live-animal removal first, that step happens before restoration. But trapping alone is not a complete solution. Learn more about why rodent removal isn’t enough.
What Happens If You Add New Insulation Over Old Droppings?
This is the “quick fix” that backfires. The logic seems reasonable: cover the contaminated insulation with new insulation and move on. The problems:
- Contamination does not disappear—it stays under the new layer
- Odors persist because the source is still there
- The attic floor was never inspected for entry points or damage
- You may be covering gaps that rodents will use again
- If you need to address the contamination later, now you have two layers to remove
New insulation should go over a clean, sanitized, sealed attic floor. Not over a problem you decided to bury.
When to Call a Restoration Company vs. a Pest Control Company
Short answer: Pest control handles trapping, extermination, and live-animal removal. Restoration handles cleanup, sanitization, exclusion (sealing), and insulation replacement. Most rodent situations require both—but in the right order.
If you have live rodents currently in your attic, a licensed pest control provider should remove them first. Then a restoration company handles the rest: removing contaminated material, cleaning and sanitizing, sealing entry points, rodent-proofing, and restoring the insulation system.
Atticare USA specializes in the restoration side: rodent droppings attic cleanup, exclusion, sanitization, insulation removal, and insulation replacement. This is the work that turns a rodent-damaged attic into a clean, sealed, properly insulated space.
For the complete picture of how these services work together, see rodent removal and attic restoration.
Frequently Asked Questions
Are rodent droppings in attic insulation dangerous?
Rodent droppings, urine, and nesting materials can carry pathogens including hantavirus, salmonella, and other bacteria. The CDC provides guidance on hantavirus prevention that emphasizes careful handling of rodent waste. Professional cleanup with HEPA equipment and proper protective gear is recommended for significant contamination. Do not sweep or vacuum dry droppings without precautions—this can aerosolize particles.
Do I need to remove insulation after rodents?
It depends on contamination severity. Heavy droppings throughout, urine saturation, nesting debris, or persistent odor usually mean removal is necessary. Surface contamination on intact insulation may be cleanable. An inspection determines the appropriate scope.
Can I clean rodent droppings myself?
For minor surface contamination in a small area, DIY cleanup is possible if you follow CDC guidelines: wear protective equipment, wet down droppings before cleaning, avoid stirring up dust, and ventilate the space. The CDC’s rodent cleanup guidance provides detailed procedures for safe handling. For attic-wide contamination or insulation involvement, professional cleanup is safer and more thorough.
Should I seal entry points before or after trapping?
If rodents are currently inside, seal entry points to cut them off from outside food sources, then trap them out. If rodents are accessing the attic from outside but not currently inside, seal first. The inspection determines the situation—and sealing should happen only after contaminated material is removed so you can actually see and access all entry points.
What to Do Next If You Found Rodent Droppings in Your Attic
The 5-step sequence works: inspect, remove contaminated insulation, clean and sanitize, seal entry points and rodent-proof, then install new insulation. Each step prepares the attic for the next. The order matters because skipping steps or rearranging them leaves problems in place—contamination buried under new insulation, entry points still open, or odors that never go away.
If you have found evidence that points to rodent droppings attic cleanup, the first step is a proper inspection to understand the actual scope: how extensive is the contamination, what condition is the insulation in, where are rodents getting in, and what sequence of work makes sense for your situation.
Atticare USA has helped over 11,000 homeowners since 2012. We offer free attic inspections to assess rodent damage, identify entry points, and provide a written proposal outlining the recommended scope of work and pricing—before you commit to anything.
Book a free attic inspection to see what is actually in your attic and get a clear plan for restoration.
Sources
- Centers for Disease Control and Prevention. “Cleaning Up After Rodents.” https://www.cdc.gov/healthy-pets/rodent-control/clean-up.html
- Centers for Disease Control and Prevention. “Rodent Control.” https://www.cdc.gov/healthy-pets/rodent-control/index.html
- U.S. Environmental Protection Agency. “Identify and Prevent Rodent Infestations.” https://www.epa.gov/rodenticides/identify-and-prevent-rodent-infestations
- ENERGY STAR. “Attic Air Sealing Project.” https://www.energystar.gov/saveathome/seal_insulate/attic-air-sealing-project
- Centers for Disease Control and Prevention. “Hantavirus Prevention.” https://www.cdc.gov/hantavirus/prevention/index.html