Learn how to evaluate attic insulation replacement quotes in California. See what legitimate costs, scope items, and red flags homeowners…
Save Up to $1200 – with Home Efficiency Federal Tax Rebate!
Save Up to $1200 – with Home Efficiency Federal Tax Rebate!

Learn how to evaluate attic insulation replacement quotes in California. See what legitimate costs, scope items, and red flags homeowners…
Added attic insulation but your Anaheim home is still hot? Learn why insulation alone fails in extreme heat and the…
Attic insulation not keeping your Pasadena home cool? Learn 5 common reasons insulation fails in hot climates and what to…
Before adding attic insulation, Bay Area homeowners should check for air leaks, contamination, and moisture. Learn when to add, remove,…
Learn what affects attic insulation replacement cost in Los Angeles after rodent damage. Understand the process, pricing factors, and when…
Most homeowners searching for attic insulation in San Jose don’t start the conversation until something forces the issue. A climbing PG&E bill. Upstairs rooms that turn into an oven every August. A smell coming from the ceiling. Or the moment a technician opens the attic hatch and finds insulation that’s been sitting there since 1987—compressed, contaminated, and doing almost nothing.
Key Takeaways
Attic insulation in San Jose is never a single conversation—it’s several.
The right scope depends on what’s already up there, what’s been living in it, and what your home really needs to perform efficiently in the Bay Area’s specific climate. This guide covers all of it: what replacement really involves, when cleanup and rodent damage repair are part of the equation, what it costs, and how to choose a contractor who won’t cut corners on the steps that matter most.
Most insulation guides treat rodent damage as a footnote. In San Jose, it deserves its own chapter.
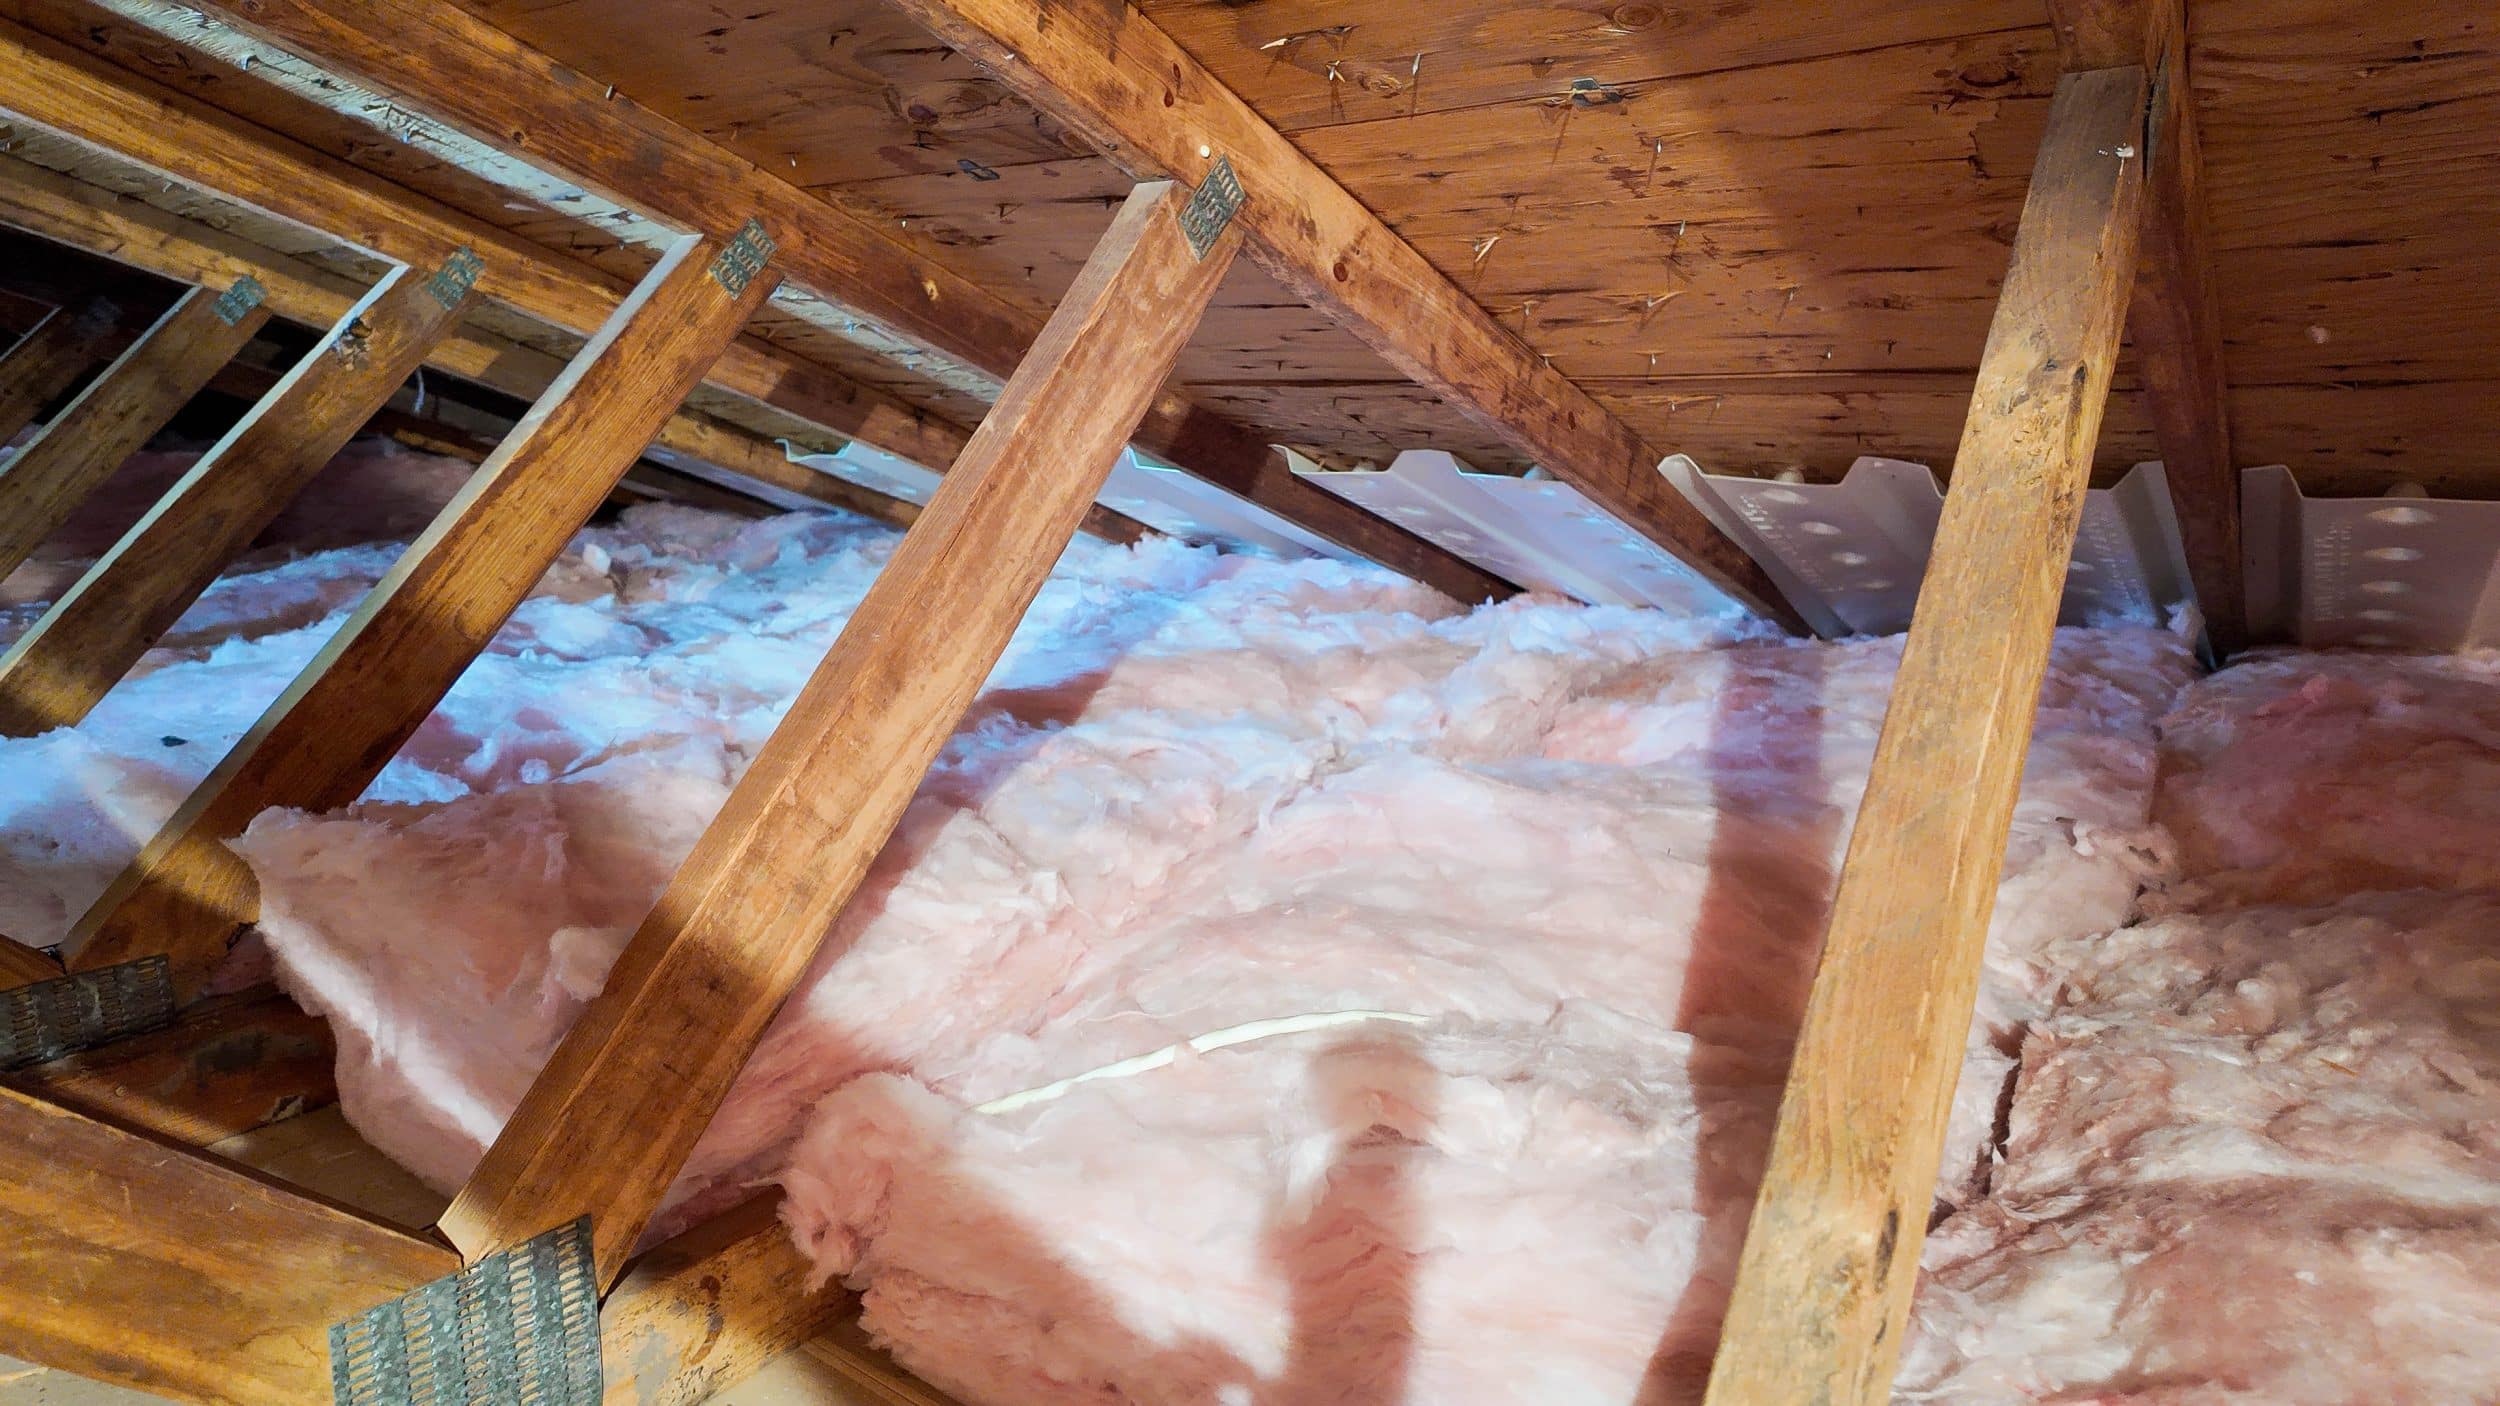
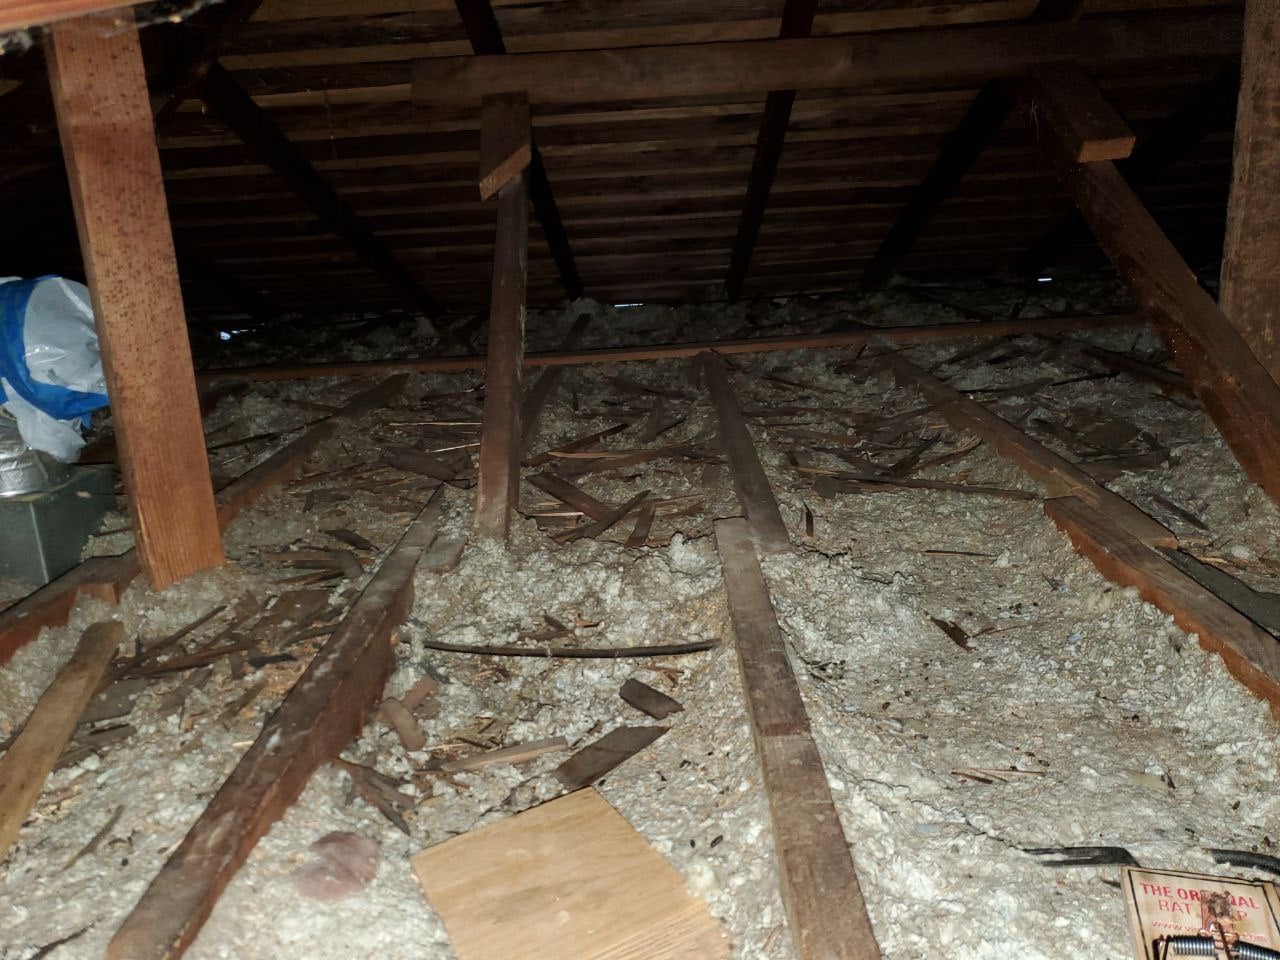
Roof rats are endemic throughout Santa Clara County. They travel utility lines, move through mature tree canopies, and squeeze through gaps as small as a half-inch to access attics. Once inside, they don’t just disturb the insulation—they nest in it, compress it, and saturate it with urine and droppings that off-gas into the living space below. What looks like an insulation problem on the surface is often a rodent problem at its root.
This is why rodent proofing has to come before insulation installation—not after. A company that installs new material without first sealing every entry point is handing rodents a clean, warm nest. Within months, the new insulation is in the same condition as what was just removed.
The sequence matters:
Skipping or rushing any of these steps means the insulation upgrade is temporary. Atticare’s attic cleaning and rodent proofing services are designed to work together as a complete system—not as separate line items you have to piece together from different vendors.
If your attic has had any rodent activity—past or present—the insulation conversation starts with exclusion, not R-values.
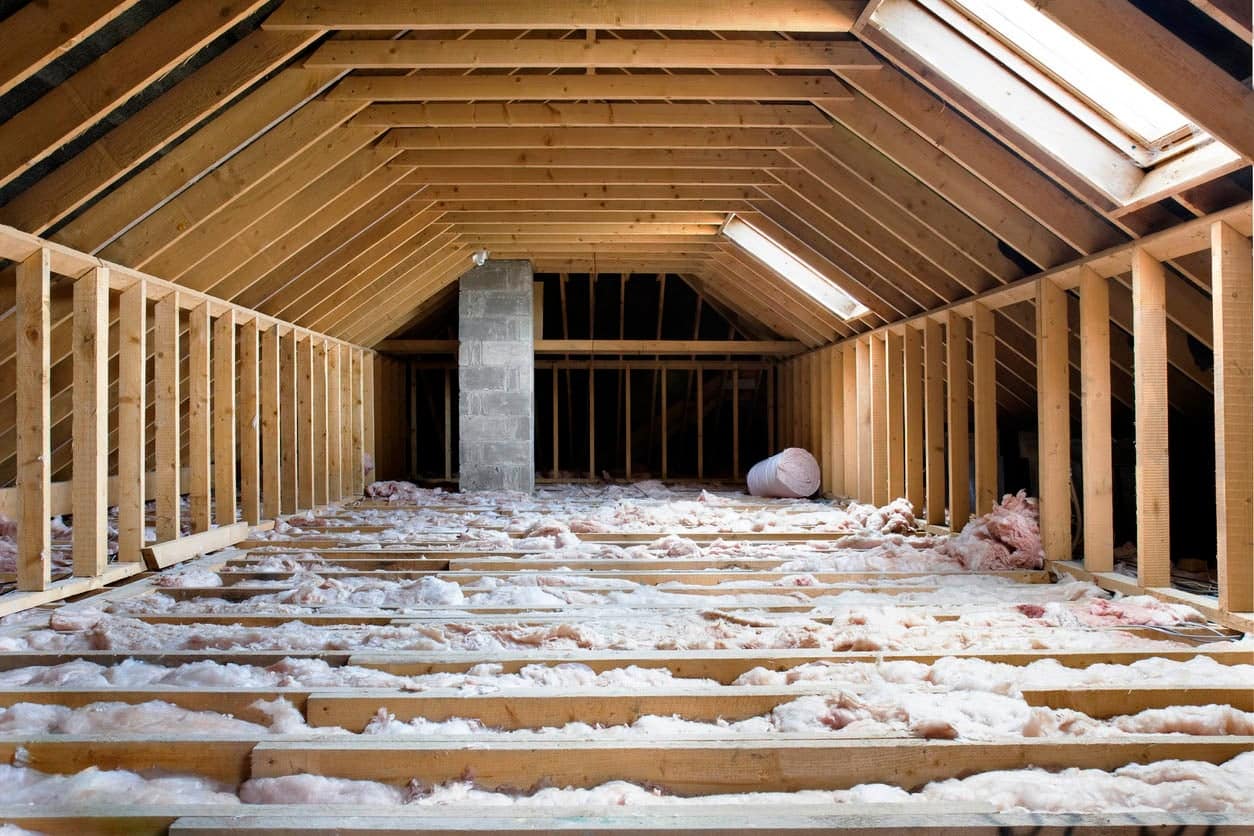
The Bay Area climate sits in an interesting middle zone—warm, dry summers with marine influence, mild winters, and persistent coastal humidity in some neighborhoods. That combination creates specific challenges for attic insulation that don’t come up in most generic installation guides.
San Jose summers can drive attic temperatures above 150°F. Without adequate insulation and proper ventilation, that heat transfers directly into the living space, forcing your HVAC system to work harder and costing you money every day it runs. Upgrading from the R-19 or lower that many older homes still have to the California-recommended R-38 can meaningfully change how your home feels—and what you pay to cool it.
But heat transfer is only part of the picture. Many San Jose homes—particularly those built before 1980—also face a rodent pressure problem that most insulation guides conveniently ignore. Roof rats are active throughout Santa Clara County. They access attics through gaps as small as a half-inch, nest in insulation, and leave behind contamination that degrades air quality throughout the home. An insulation upgrade that doesn’t account for this isn’t a complete solution.
There’s a common misconception that new insulation can simply be added on top of old. Sometimes that’s true. Often it isn’t. Here’s when full removal and replacement is the right call:
Condition | Remove & Replace? | Add On Top? |
Rodent contamination (urine, droppings) | Yes—always | No |
Moisture damage or mold | Yes | No |
Severe compression or settling | Yes | No |
Vermiculite / potential asbestos | Test first | Do not disturb |
Minor depth loss, clean material | No | Yes |
Adequate depth, good condition | No | No—inspect only |
If rats or mice have been active in your attic, the insulation is compromised. Rodent urine saturates blown-in material, reducing its R-value and creating a persistent odor source that off-gases into your living space. Droppings harbor pathogens that become airborne when the attic is disturbed. Layering new insulation over contaminated material doesn’t fix this—it buries it.
Full removal, sanitation and decontamination, and rodent-proofing must happen before any new insulation is installed. This is non-negotiable for homes with active or recent rodent history.
Attic leaks, condensation from inadequate ventilation, or bathroom exhaust fans venting into the attic (still common in older San Jose construction) can saturate insulation to the point where it harbors mold. Wet insulation loses most of its thermal performance and becomes a health concern. It has to come out.
Insulation that’s been compressed—by foot traffic, stored items, or simply age—no longer holds its rated R-value. Blown-in material that’s settled to half its original depth is performing at half its rated capacity. If the material is physically intact and uncontaminated, adding depth may suffice; if it’s compressed and matted, replacement is the better investment.
Homes built before the mid-1970s may contain vermiculite insulation with asbestos content. If you’re not sure what’s in your attic, have it tested before anyone goes up there to work. A reputable contractor won’t skip this assessment in an older home.
Material | Best For | Pros | Rodent History? |
Blown-in fiberglass | Clean attics, irregular joist bays | Even coverage, cost-effective | Not recommended |
Blown-in cellulose | Older homes, eco-conscious upgrades | Dense fill, recycled content | Not recommended |
Batts (fiberglass or mineral wool) | Homes with rodent history | Accessible, replaceable in sections | Preferred choice |
Spray foam | High-performance sealing upgrades | Air seal + insulation in one | Situational |
For most Bay Area homes without rodent history, blown-in fiberglass paired with thorough air sealing delivers the best balance of performance and value. For homes where rodents have been present, batts is the call—full stop.
Most insulation articles default to recommending blown-in fiberglass or cellulose for Bay Area attics. It’s a reasonable recommendation in many situations—blown-in achieves even coverage across irregular joist bays and works well in the tight spaces common in older San Jose homes. For a straightforward upgrade in a clean, rodent-free attic, it’s an efficient and cost-effective choice.
But for homes with any history of rodent activity—which describes a significant share of San Jose properties—batts insulation deserves serious consideration as the stronger long-term option.
Here’s the practical reason: if rodents return after installation (and in active neighborhoods, they often do), blown-in insulation becomes nearly impossible to work around. Any access to investigate, re-seal entry points, or address new activity kicks up a cloud of particulates throughout the attic. Batts, by contrast, can be lifted in sections, inspected, and replaced without disturbing the entire installation.
The attic stays serviceable. That’s not a minor convenience—it’s the difference between a permanent fix and a recurring problem.
A contractor who doesn’t ask about your rodent history before recommending a material isn’t giving you a complete picture. Atticare’s material guide covers this comparison in detail.
When rodents have been active in an attic, the remediation scope goes well beyond pulling out old insulation. Here’s the full sequence that a properly handled project requires:
Full Attic Inspection
A technician documents the extent of contamination, identifies active entry points, and assesses structural damage to the attic decking, rafters, and ductwork. Photos are taken throughout.
Rodent Removal and Exclusion
Active rodents are removed, and all entry points are sealed with corrosion-resistant materials—metal flashing, hardware cloth, and foam sealant at gaps and penetrations. Rodent proofing at this stage is what separates a permanent fix from a temporary one. Sealing must be complete before insulation is touched.
Contaminated Insulation Removal
All affected material is vacuumed or carefully removed in sealed bags and disposed of properly. This step typically takes a full day for a standard San Jose home.
Sanitation and Decontamination
The attic surfaces—decking, joists, rafters—are treated with a non-toxic sanitizing agent that neutralizes odors and eliminates pathogens left behind by rodent waste. This step cannot be skipped if you want the odor and air quality problems resolved.
Air Sealing
Every significant penetration, gap, and attic bypass is sealed before new insulation goes in. Air sealing is what gives insulation its real-world performance—without it, conditioned air escapes through bypasses regardless of how much material is added.
New Insulation Installation
Material is selected and installed to the appropriate R-value for San Jose’s climate zone—typically R-38—with the choice of batts or blown-in informed by the property’s rodent history and attic configuration.
Final Documentation
Before-and-after photos, R-value confirmation, and a written record of all work completed. A reputable contractor provides this without being asked.
Insulation Level | Summer Performance | Winter Performance | Upgrade Priority |
R-11 or below | Poor—significant heat gain | Poor—major heat loss | Urgent |
R-13 to R-19 | Below average | Below average | High |
R-21 to R-30 | Moderate | Moderate | Recommended |
R-38 (California target) | Good | Good | Maintain |
R-49+ | Excellent | Excellent | High-performance upgrade |
California’s Title 24 energy code recommends R-38 for attics in most Bay Area climate zones. Many older San Jose homes—particularly those built in the 1960s through 1980s—have insulation levels well below this, sometimes as low as R-11 or R-13.
The practical impact of that gap is substantial. At R-13, an attic provides minimal resistance to summer heat gain. At R-38, heat transfer into the living space is significantly reduced, AC runtime decreases, and the home maintains more consistent temperatures between floors.
If your home was built after 2006 and has had no significant attic work since, it may already be close to code. A free inspection will tell you exactly where you stand—depth measurements, coverage uniformity, and any problem areas.
Pricing depends on attic size, existing conditions, and how much prep work the project requires. Here’s a realistic breakdown:
Service | Typical San Jose Range |
Attic inspection | Free – $200 |
Blown-in insulation installation (clean attic) | $1,500 – $4,000 |
Batts insulation installation | $1,800 – $4,500 |
Insulation removal (contaminated) | $1,500 – $6,000 |
Attic sanitation | $800 – $2,000 |
Rodent exclusion and sealing | $1,500 – $4,500+ |
Air sealing | $500 – $1,500 |
Full attic restoration (rodent damage) | $3,000 – $8,000+ |
For a typical 1,500–2,000 sq ft San Jose home requiring contamination removal, sanitation, exclusion, and new insulation, expect total project costs in the $4,500–$8,000 range. A quote that comes in dramatically below that usually means something was removed from the scope—confirm exactly what’s included before signing. Homeowners comparing attic insulation in San Jose contractors should use these ranges as a baseline when evaluating bids.
While the upfront cost of a full attic restoration is an investment, it is one of the few home improvements with a nearly immediate impact on both monthly overhead and property value. In the competitive San Jose real estate market, a clean, rodent-proofed, and energy-efficient attic is a significant asset during home inspections.
Choosing a comprehensive restoration over a “patch job” ensures that you aren’t paying for the same service twice in three years.
The questions you ask before hiring matter as much as the work itself. Here’s what to cover:
A contractor who hesitates on any of these questions is a contractor worth reconsidering.
Atticare serves San Jose and the broader Bay Area with licensed, insured technicians and a process that starts with a free inspection and ends with documented, warranty-backed work. See what Bay Area homeowners say about the experience.
What Summer Heat Does to an Under-Insulated San Jose Attic
San Jose regularly sees summer temperatures in the 90s. On a 95°F day, an uninsulated or under-insulated attic can reach 150°F or higher. That heat radiates downward through the ceiling into your living space, forcing your air conditioning to run longer and work harder to maintain comfortable temperatures—especially on upper floors.
Proper attic insulation at R-38, combined with adequate ventilation, creates a thermal barrier that significantly reduces this heat transfer. Homeowners who upgrade from older, low-depth insulation routinely notice the difference in upstairs comfort within the first summer—and on their energy bills.
Adding a radiant barrier alongside insulation can further reduce radiant heat gain in San Jose’s sunny climate—worth discussing with your contractor for high-performance results.
Air sealing. It’s not the visible part of the job, it doesn’t photograph well for before-and-after comparisons, and it adds time and labor to the project. But it’s the step that determines whether your insulation actually performs at its rated value—or just sits there while conditioned air escapes through every gap around a recessed light, plumbing penetration, or top plate.
Studies from the Department of Energy consistently show that air sealing combined with insulation delivers significantly better energy performance than insulation alone. A contractor who skips it is leaving real performance—and real savings—on the table.
At Atticare, air sealing is part of every full attic project. It’s not an upsell—it’s part of doing the job right.
When attic insulation in San Jose is handled correctly—contamination addressed, entry points sealed, air sealing completed, and material installed to the right R-value—the results are tangible. More consistent temperatures between floors. Lower cooling costs through summer. A healthier attic environment with better air quality throughout the home. And the confidence that the problem was fixed at the source, not papered over.
That’s the difference between a project done right and one that looked right on the day of installation.
Your attic is worth doing properly. Book a free inspection and find out exactly where yours stands.
How much can I save on energy bills with new insulation?
Most homeowners in the Bay Area see a 10%–15% reduction in their monthly heating and cooling costs. The exact savings depend on your previous R-value, but upgrading from R-19 to the recommended R-38 significantly reduces the “oven effect” in San Jose summers.
How much does attic insulation cost in San Jose?
Most projects range from $3,000–$8,000+ depending on home size and how much prep work—removal, sanitation, or rodent exclusion—is required. A free inspection gives you an accurate number for your specific attic.
What type of insulation is best for Bay Area homes?
Blown-in fiberglass works well in clean attics, but batts insulation is the better long-term choice for homes with any rodent history because it keeps the attic accessible and serviceable after installation.
What R-value is recommended for San Jose attics?
R-38 is the California-recommended target for most Bay Area climate zones. Many older San Jose homes currently have R-19 or lower, which represents a significant performance gap.
How long does attic insulation installation take?
A straightforward installation typically takes 4–8 hours. Projects that include insulation removal and sanitation usually run 1–2 days total.
Should old insulation be removed before installing new?
Yes, if it’s contaminated by rodents, wet, moldy, or severely compacted. Layering new material over damaged insulation traps contaminants and doesn’t restore performance.
Does attic insulation reduce summer heat in San Jose?
Significantly. Proper R-38 insulation combined with air sealing creates a thermal barrier that reduces heat transfer from a 150°F attic into the living space, improving upstairs comfort and lowering AC runtime.
How do I find a reputable attic insulation contractor in San Jose?
Look for a contractor who is CSLB-licensed, carries insurance, inspects before quoting, and provides a written line-item estimate. Ask specifically whether they handle air sealing and rodent assessment as part of the standard scope.

Most homeowners start shopping for attic insulation pretty much the same way. They get a few quotes, pick the middle number, and assume the work will be roughly the same whoever does it.
It rarely is.
A basic insulation install and a proper attic upgrade are two very different things.
One contractor blows in new material over whatever’s already up there and calls it done. Another pulls the old insulation, air seals the floor, checks ventilation, and installs to the R-value your climate zone requires. Same category of work. Very different outcomes.
This guide covers what the best attic insulation companies in the Bay Area do, what it costs, and the questions worth asking before anyone sets foot in your attic.
Schedule a free attic inspection with Atticare.
A basic installer shows up with a blower machine, fills the attic to a target depth, and leaves. That’s it. No assessment of what’s already up there. No air sealing. No check on whether the ventilation can handle new insulation without creating moisture problems.
A full-service attic insulation company approaches the job differently.
Before any material goes in, a licensed technician inspects the existing insulation for rodent contamination, moisture damage, or compression. Air leaks get sealed at the attic floor, around recessed lights, plumbing penetrations, and top plates. Ventilation is checked to make sure soffit and ridge airflow is balanced.
Only then does new insulation go in, at the right R-value for your specific Bay Area climate zone.
The practical difference shows up fast. Rooms that used to run hot in summer stay noticeably cooler. Heating systems cycle off rather than running for hours. Energy bills reflect the change within the first season.
Homeowners who upgraded from R-19 to R-60 saw heating bills drop by around 20% compared to the previous year. Others who replaced badly installed R-30 batts with spray foam found their air conditioning ran about 35% less during the hottest summer months.
Air sealing is often the piece that makes the biggest difference, and the piece that gets skipped most often. Done properly, it can improve energy efficiency by 20 to 30 percent on its own, before a single bag of insulation goes in.
When you’re evaluating contractors, the scope of work tells you more than the price does. Here’s what a full-service company should bring to the table:
If existing insulation is contaminated, compressed, or moisture-damaged, it needs to come out before anything new goes in. Layering new material over a problem doesn’t fix the problem.
Bay Area attics see a significant amount of rodent activity. A contractor who doesn’t ask about this, or doesn’t check, is skipping a step that matters. Contaminated insulation holds odors that attract new animals and creates ongoing air quality concerns for the home below.
Non-negotiable in any quality attic upgrade. Every gap at the attic floor gets sealed before insulation is installed. Without it, the new insulation underperforms regardless of its rated R-value.
Proper attic ventilation, balanced soffit intake and ridge exhaust, protects new insulation from moisture buildup. A contractor who installs insulation without checking ventilation can inadvertently create conditions for mold.
Particularly relevant for Bay Area homes with significant sun exposure or hotter inland microclimates. A radiant barrier installed at the rafters works alongside insulation to reduce summer heat gain, something insulation alone doesn’t fully address.
California’s building energy standards require minimum R-values for attic upgrades. Any contractor working in the Bay Area should know your specific climate zone requirements and install accordingly.
See what a full attic upgrade includes with Atticare.
Most Bay Area climate zones require a minimum of R-38 for attic insulation under California Title 24. Some inland areas with greater temperature swings benefit from going higher.
If your attic is currently sitting at R-19 or below (common in homes built before the 1990s), you’re losing a meaningful amount of conditioned air year-round. Upgrading to R-38 reduces winter heat loss, cuts summer heat gain, and takes measurable strain off your HVAC system.
The right insulation type depends on your attic’s specific conditions:
For most Bay Area homes, blown-in fiberglass installed to R-38 with thorough air sealing delivers the best balance of performance and cost.
Pricing varies based on attic size, existing conditions, and the scope of work involved. Here’s a general range for single-family homes:
Home Size | Estimated Cost Range |
1,200–1,800 sq ft | $3,000–$5,000 |
2,000–2,500 sq ft | $4,500–$7,500 |
2,500–3,500 sq ft | $6,000–$10,000+ |
These figures assume a full-service upgrade including air sealing. Projects that also require old insulation removal, rodent contamination cleanup, or ventilation corrections will run toward the higher end.
A few factors that move the number significantly:
The fastest way to get a real number is a proper attic inspection. Quotes based on square footage alone, without seeing actual conditions, are rarely accurate.
Get a custom quote for your Bay Area home.
It can, but insulation alone doesn’t prevent mold. Moisture control does. What insulation contributes is temperature stabilization, which reduces the condensation risk that creates conditions for mold growth.
Ventilation is what keeps mold out. A properly ventilated attic, with balanced soffit intake and ridge exhaust, keeps air moving. This prevents moisture from accumulating in the insulation or on roof sheathing. When insulation is installed without checking ventilation, it can make moisture problems worse by reducing airflow.
This is one reason a proper attic inspection before installation matters. Ventilation issues found before the job starts are straightforward to address. Found after new insulation is in, they’re a much bigger problem.
For most Bay Area homes, a full attic insulation upgrade takes one to two days.
The inspection itself runs thirty to sixty minutes. If old insulation needs to come out, that’s typically a full day of work on its own. Air sealing and new insulation installation usually happen the same day and take between four and eight hours depending on attic size and complexity.
If your project includes rodent contamination cleanup, ventilation corrections, or radiant barrier installation, expect it to take a little longer. A good contractor will give you a realistic timeline after the inspection, not before.
The best attic insulation company in the Bay Area will answer these without hesitation:
A contractor who treats any of these as optional is telling you something about how they approach the work.
Compare Atticare’s full scope of attic services.
Price alone is not a useful comparison point if the scopes of work are different. Before putting quotes side by side, confirm each one includes:
A quote that comes in significantly lower than others usually means something in that list is missing. Finding out which item after the work is done is the expensive way to learn it.
The homeowners who ask this question most often are the ones who’ve lived in an under-insulated Bay Area home through a summer. Rooms that won’t cool down. An HVAC system that runs for hours without catching up. Energy bills that don’t reflect what the thermostat is set to.
A properly installed attic insulation upgrade, air sealed and brought to the right R-value, addresses all of that.
Most homeowners see the impact within the first billing cycle after installation. The longer-term return, between lower energy bills, reduced HVAC wear, and improved home value, typically makes the investment recover within two to five years.
The one caveat is that the investment only pays off when the work is done right. Insulation installed over contaminated material, no air sealing, or the wrong R-value for your climate zone underperforms from day one.
Book a free attic inspection and find out where your home stands.
A lower price sounds appealing until you’re back to square one six months later. The best attic insulation company finds the problems you didn’t know you had, tells you exactly what needs to happen, and does the work to a standard that holds up.
That’s what we show up to do on every job. Atticare has completed attic upgrades across the Bay Area and Los Angeles, and 98% of our customers would recommend us.
Every project starts with a free inspection. Not a phone estimate or a number based on square footage, but an actual look at your attic so you know exactly what you’re dealing with before any work begins.
Schedule your free attic inspection today.
What is the best attic insulation for Bay Area homes?
For most Bay Area homes, blown-in fiberglass insulation installed to a rating of R-38 is the gold standard. It provides an excellent balance of thermal performance and affordability when paired with thorough air sealing. Spray foam offers superior air sealing and performance for specific high-performance upgrades or challenging, drafty corners. It’s significantly more expensive and often overkill for a standard attic.
How much does attic insulation cost in the Bay Area?
Most single-family home projects range from $3,000 to $8,000 or more, depending on attic size, existing conditions, and scope. Projects requiring rodent cleanup or full insulation removal run toward the higher end. A proper attic inspection is the only way to get an accurate number.
What R-value is recommended for the Bay Area?
Most Bay Area climate zones require a minimum of R-38 under California Title 24. Some inland areas with more significant temperature variation benefit from going higher.
Does attic insulation help with mold prevention?
It’s a common misconception that insulation alone prevents mold. The real secret to a healthy attic is proper ventilation. If you have adequate soffit and ridge airflow, moisture can escape, preventing the condensation that leads to mold. By adding more insulation without first checking that your vents aren’t blocked, you can actually trap more moisture and make the problem worse.
How long does attic insulation installation take?
Most attic insulation projects can be completed in just one to two days. If your project is straightforward, it is often a one-day job. Expect a slightly longer timeline if the crew needs to spend time on extensive cleaning, removing old material, or fixing ventilation issues before they can lay down the new insulation.
Where can I get a free attic insulation inspection in the Bay Area?
Atticare offers free attic inspections across the Bay Area. Book yours here.
Los Angeles homeowners face a unique problem: the relentless summer heat drives up utility bills and makes indoor comfort elusive. Standard insulation often fails to combat the intensity of the Southern California climate.
To truly stabilize your home environment and reduce those cooling costs, selecting the best attic insulation for Southern California becomes a critical investment. This choice directly determines your property’s year-round energy efficiency.
Our expert guide cuts through the options, comparing materials proven most effective in extreme L.A. temperatures to help you find the optimal solution for your house and budget.
Southern California’s hot, dry climate creates specific insulation requirements that differ from traditional recommendations designed for cold-weather regions. While much of the country focuses on retaining heat during winter, Los Angeles homeowners need insulation that primarily blocks radiant heat and reduces cooling loads.
LA’s intense sun exposure creates extreme attic temperatures—often reaching 140-160°F during summer months. This radiant heat transfers through your roof into living spaces, forcing air conditioning systems to work overtime. Without proper, heat-resistant insulation, your HVAC system struggles to maintain comfortable indoor temperatures while energy bills soar.
The key isn’t just insulating—it’s choosing climate-appropriate materials that reflect heat, seal air leaks, and provide thermal barriers optimized for hot weather performance.
When evaluating the best attic insulation for Southern California homes, experts recommend focusing on three primary factors: thermal resistance (R-value), air sealing capability, and heat reflection properties. Here are the top-performing options for Los Angeles residences.
Spray foam stands as the most high-performance option for Los Angeles attics, offering superior benefits that justify the higher investment for many homeowners.
Why Spray Foam Excels in Hot Climates:
Spray foam provides exceptional thermal protection and air-tight sealing that dramatically improves energy efficiency. Unlike traditional insulation materials, spray foam expands to fill every gap, crack, and irregular space, eliminating air leakage that undermines other insulation types.
Key Benefits:
Cost Considerations: Expect to invest $3.00-$7.00 per square foot for spray foam installation in Los Angeles. While this represents a premium price point, the energy savings typically offset costs within 5-8 years.
Best Applications:
Professional insulation services ensure proper application and optimal performance for spray foam projects.
Blown-in insulation offers an affordable, effective solution that works exceptionally well for most Los Angeles residences. This category includes both fiberglass and cellulose options.
Blown-In Fiberglass:
Fiberglass blown-in insulation provides reliable thermal protection at moderate cost, making it the most popular choice among LA homeowners.
Benefits:
Considerations:
Blown-In Cellulose:
Eco-friendly cellulose insulation appeals to environmentally conscious homeowners while delivering solid thermal performance.
Benefits:
Considerations:
Both blown-in options represent excellent choices for Los Angeles homes seeking cost-effective thermal protection. Learn more about batts and blown insulation materials to understand which suits your needs.
While not insulation in the traditional sense, radiant barriers offer critical heat reflection benefits specifically valuable in Los Angeles’s sunny climate.
How Radiant Barriers Work:
Radiant barriers consist of reflective material (typically aluminum foil) installed on the underside of roof decking. They reflect up to 97% of radiant heat back toward the roof, preventing heat transfer into attic spaces.
Benefits for LA Homes:
Installation Considerations: Radiant barriers work best when combined with adequate traditional insulation. They’re most effective in:
Cost: Professional radiant barrier installation ranges from $0.50-$1.50 per square foot, making it an affordable upgrade that complements primary insulation.
Traditional fiberglass or mineral wool batts represent the most basic insulation option. While affordable, they offer limited advantages for Los Angeles homes compared to blown-in or spray foam alternatives.
When Batts Make Sense:
Limitations:
For most Los Angeles retrofit projects, blown-in or spray foam options deliver superior results despite slightly higher costs.
Comparing insulation materials requires understanding how thermal resistance translates to real-world cooling cost reductions in Southern California’s climate.
California’s Title 24 energy standards recommend R-38 to R-49 for attic insulation in Los Angeles climate zones. However, higher R-values don’t always deliver proportional benefits in hot climates where preventing heat gain (rather than retaining heat) is the priority.
Recommended R-Values by Installation Type:
Spray Foam:
Blown-In Fiberglass:
Blown-In Cellulose:
Use Atticare’s insulation calculator to determine the optimal R-value and material quantity for your specific attic size and configuration.
In Los Angeles’s hot climate, air sealing and heat reflection matter as much as R-value. Studies show that air infiltration accounts for 25-40% of cooling costs in poorly sealed homes.
Performance Ranking for LA Climate:
The best insulation choice depends on your budget, home condition, and energy efficiency goals.
Energy auditors and HVAC professionals consistently recommend specific insulation strategies for maximizing efficiency and comfort in Los Angeles homes.
Rather than focusing solely on insulation material, experts advocate for comprehensive attic upgrades addressing multiple efficiency factors:
Professional air sealing reduces cooling costs by 10-20% before insulation installation even begins.
Older LA Homes (Pre-1980):
Newer Homes (1980-2010):
Modern Homes (Post-2010):
Professional insulation replacement services ensure comprehensive upgrades addressing all efficiency factors.
Understanding how different materials perform in Southern California’s unique environment helps you make informed decisions aligned with your priorities.
Insulation Type | R-Value per Inch | Air Sealing | Heat Resistance | Moisture Resistance | Cost per Sq Ft | Lifespan |
Closed-Cell Spray Foam | R-6.5-7 | Excellent | Excellent | Excellent | $5-7 | 80+ years |
Open-Cell Spray Foam | R-3.5-4 | Excellent | Very Good | Good | $3-4.50 | 80+ years |
Blown-In Cellulose | R-3.2-3.8 | Good | Very Good | Fair | $1.80-3 | 20-30 years |
Blown-In Fiberglass | R-2.2-2.7 | Fair | Good | Excellent | $1.50-2.50 | 20-30 years |
Fiberglass Batts | R-2.9-3.8 | Poor | Good | Good | $1-2 | 20-30 years |
Radiant Barrier | N/A | None | Excellent* | Excellent | $0.50-1.50 | 50+ years |
*Radiant barriers reflect heat but provide no insulation value themselves
For most Los Angeles residences, blown-in fiberglass or cellulose combined with a radiant barrier offers the optimal balance of thermal performance, cost-effectiveness, and long-term value.
This combination provides:
For homeowners prioritizing maximum efficiency regardless of cost, closed-cell spray foam with radiant barrier delivers unmatched performance but requires 2-3x the investment.
Budget-conscious homeowners can achieve significant improvements with blown-in fiberglass alone, though adding a radiant barrier later remains relatively easy and cost-effective.
Learn more about choosing the right R-value for your specific needs and goals.
Professional installation ensures optimal performance, code compliance, and maximum energy savings. Los Angeles homeowners benefit from working with experienced contractors who understand regional climate challenges and building requirements.
Essential Qualifications:
Service Capabilities: Professional contractors should offer comprehensive attic services including:
Atticare has served Los Angeles area homeowners for years, specializing in climate-appropriate insulation solutions optimized for Southern California conditions.
Our Expertise Includes:
Serving All Los Angeles Areas: We provide professional insulation services throughout Los Angeles, including:
Los Angeles homeowners can reduce insulation costs significantly through utility company rebates and federal tax incentives.
Available Incentives:
Professional contractors like Atticare help you navigate rebate requirements, ensuring your project qualifies for maximum incentives.
Los Angeles homeowners typically see dramatic cooling cost reductions after professional attic insulation installation:
Average Savings by Project Type:
For a typical LA home with $200 monthly summer cooling costs, upgrading from R-11 to R-49 insulation can save $50-70 monthly—$600-840 annually—making most projects cost-effective within 3-6 years.
Beyond energy efficiency, proper attic insulation significantly improves indoor air quality—a critical consideration for Los Angeles residents concerned about air pollution and allergens.
Air Quality Improvements:
Reduced outdoor pollutant infiltration: Proper insulation and air sealing prevent outdoor air pollution, pollen, and allergens from entering your home through attic gaps and cracks.
Better humidity control: Quality insulation helps maintain consistent indoor humidity levels, reducing dust mites and mold growth potential.
Lower HVAC strain: Efficient insulation reduces AC runtime, decreasing the circulation of dust and contaminants through your HVAC system.
Non-toxic material options: Eco-friendly insulation materials like cellulose provide effective thermal protection without off-gassing concerns common with some traditional materials.
For homeowners prioritizing both energy efficiency and indoor air quality, blown-in cellulose or spray foam options deliver comprehensive benefits supporting healthier home environments.
Deciding on the best attic insulation for Southern California starts with recognizing your home’s specific needs, current condition, and energy efficiency goals. Professional assessment identifies the optimal solution for your budget and priorities.
Get Started Today:
Contact Atticare for your free, no-obligation attic insulation assessment. Our Los Angeles area experts will:
Ready to Lower Your Cooling Costs?
Don’t let inadequate attic insulation drive up your energy bills and compromise home comfort. Los Angeles homeowners who invest in proper, climate-appropriate insulation enjoy:
Schedule your free assessment today and discover how much you can save with professional attic insulation optimized for Southern California’s unique climate.
Atticare provides expert attic insulation installation, replacement, and energy efficiency upgrades throughout the Los Angeles area. Our certified professionals specialize in climate-appropriate solutions that maximize comfort and savings for Southern California homes.

How much does it cost to insulate an attic in Los Angeles? The honest answer: $2,500–$9,000 depending on scope, materials, and whether you’re topping off clean insulation or removing contaminated material. How much does it cost to get an attic insulated professionally varies dramatically based on your specific attic conditions and performance goals.
Los Angeles homeowners planning attic insulation upgrades face confusing quotes with wildly different prices and scope. A simple blown-in top-off for a 1,000 sq. ft. clean attic costs far less than full removal, sanitization, comprehensive air sealing, and R-38 installation for a 2,000 sq. ft. attic with rodent damage. The difference? Scope, not just square footage. Understanding attic insulation price per square foot alone won’t give you an accurate budget—you need to know what’s included in that number.
Atticare delivers upfront, line-item pricing for Los Angeles County—free consultations with photo documentation, written estimates showing material specs, air-sealing hours, baffle counts, warranties, and timelines. Need financing or bundle discounts when pairing insulation installation with attic cleaning or rodent proofing? Atticare makes it transparent and affordable.
This guide breaks down attic insulation cost Los Angeles pricing by project type, square footage, and material, explains cost drivers, shows what should be in every estimate, and helps you compare quotes apples-to-apples.
Before diving into specifics of how much does it cost to insulate an attic in Los Angeles, understand these cost realities:
Scope sets the price. Removal/sanitization, air sealing, baffles, and access drive costs more than square footage alone.
Always demand line items. Your estimate should spell out: material type, target R-value, air-sealing, Square foot coverage, disposal, cleanup, warranty, and schedule.
Air sealing + correct R-value beats “more insulation” alone. Proper air sealing adds $750–$2,000 but delivers 30–50% better performance.
Save with bundles. Pair insulation with cleaning or rodent proofing for 10–20% discounts.
Free Atticare estimate = upfront pricing, rebate & tax credit help, before & after photos. Get a written estimates within 24–48 hours—no surprises.
| Project Type | Typical Scope | Biggest Price Drivers | Est. Cost Range |
| Top-Off (Keep Existing) | Air sealing + blown-in to R-38+ | Air-sealing hours, R-value target, access | $2,500–$4,500 |
| Partial Removal + Reinstall | Remove problem zones + sanitize + new insulation | Removal time, contamination extent | $3,500–$6,500 |
| Full Remediation | Complete removal + sanitize + air seal + baffles + R-38–R-49 | End-to-end labor, debris volume, ventilation work | $4,500–$9,000+ |
Remove if: Rodent droppings, musty odors, water stains, crushed batts, or wiring access needed.
Top off if: Existing insulation is dry, clean, intact, and air sealing is feasible.
Pro tip: Request both options in your Atticare estimate—photos justify which approach delivers best ROI.
Yes. Los Angeles homeowners typically see 15–25% lower cooling costs, 10–15% lower heating costs, payback in 12–24 months, steady room temperatures, less HVAC wear, and higher resale value.
Without insulation: 30–40% energy wasted, extreme upstairs temps, AC running constantly, $300–$500+ monthly bills, and premature HVAC failure.
Typical project: Clean attic needing R-38 top-off with sanitation and air sealing. This represents how much does it typically cost to insulate an attic on the smaller end of the spectrum for LA County homes.
What to ask in your quote:
Don’t compare quotes without these line items. A “$2,000” quote skipping air sealing costs you more in wasted energy over 2–3 years than a $3,500 comprehensive quote.
How many bags for 1,000 square feet?
Blown-in fiberglass (R-38): ~20–24 bags | Cellulose: ~18–22 bags
Ask for two quotes: top-off only vs. partial/full removal + reinstall. Photos should justify removal recommendations.
Ask about: Access constraints, crew size, ventilation upgrades, phasing options.
Per square foot: $2.50–$4.50/sq. ft. depending on scope—but per-square-foot pricing hides critical details. Demand line-item breakdowns.
How much does it cost to insulate an attic varies significantly by material choice. Here’s your buyer comparison:
| Material | Where It Shines | Pros | Cons/Risks | Budget Notes |
| Blown-in Cellulose | Irregular spaces, soundproofing | Fills gaps, eco-friendly, sound dampening | Heavier, settles over time | $1.50–$3.0/sq. ft. installed |
| Blown-in Fiberglass | Clean attics, fast coverage | Lightweight, quick, fire-resistant | Can drift without air sealing | $1.50–$3.25/sq. ft.; most popular LA choice |
| Fiberglass Batts | Wide-open joists | Easy to inspect, predictable R-value | Gaps around irregular framing | $1.75–$3.50/sq. ft. installed |
| Spray Foam | Rim joists, targeted spots | Air seal + insulation at once | 2–3× more expensive, complex codes | $6.50–$8.5/sq. ft.; use surgically |
Blown-in (cellulose or fiberglass) wins for most LA attics—fills irregular spaces, no gaps, faster install. Batts work for wide-open joists with minimal obstructions. Check our blown-in insulation material guide for details.
$12,000–$18,000 for closed-cell foam on a 2,000 sq. ft. attic—that’s 2–3× more than blown-in alternatives. How much does it cost to foam insulate an attic breaks down to roughly $4.00–$9.00 per square foot depending on foam type (open-cell vs. closed-cell), thickness applied, and whether you’re creating a sealed attic assembly (which requires HVAC modifications).
For comparison, the same 2,000 sq. ft. attic costs $3,000–$6,000 for blown-in fiberglass or cellulose to R-38—delivering similar thermal performance without the complexity, expense, or potential code violations that come with spray foam in vented attics.
Not for most LA attics. Spray foam costs 2–3× more with minimal added benefit in LA’s dry climate. For 95% of Los Angeles homes, blown-in costs 60–70% less and meets code requirements.
High cost, trapped moisture if installed wrong, difficult removal, code violations in vented attics, and resale complications. Many LA homeowners pay $3,000–$8,000 for spray foam removal later. Stick with blown-in for traditional vented attics.
Understanding how much does it cost to insulate an attic means knowing what’s included. Demand every line item in your quote:
Yes. Even in mild LA, summer attic temps hit 130–150°F. Insulating the attic floor creates thermal boundary, reducing cooling costs 15–25%. California Title 24 requires R-30 to R-38 minimum.
Avoid: directly over non-IC-rated recessed lights, blocking soffit vents (use baffles), covering electrical boxes, around furnace flues (maintain clearances).
R-30: ~10–11 inches (cellulose) or 9–10 inches (fiberglass)
R-38: ~13–14 inches (cellulose) or 12–13 inches (fiberglass)
R-49: ~16–17 inches (cellulose) or 15–16 inches (fiberglass)
See our R-value factors guide for details.
For most LA attics: Blown-in fiberglass (best value, fire-resistant). Coastal LA (Zone 6): R-30 minimum. Inland LA (Zone 9—Valley, Pomona): R-38 minimum.
Get your Atticare line-item estimate with air sealing and baffles included.
A major factor in how much does it cost to insulate an attic is whether you need removal or can simply top off existing insulation.
Rodent contamination (droppings, urine, nests, strong ammonia smell)
Water damage (stains, mold, soggy insulation from roof leaks)
Crushed batts (lost 50%+ R-value, severely compressed material)
Safety concerns (wiring hazards, asbestos in pre-1980 homes, damaged vapor barriers)
Renovation needs (running new wiring, adding HVAC ducts)
Removal costs: $2.00–$3.20/sq. ft. including labor, disposal, and HEPA containment. For 1,500 sq. ft., expect $3,000–$4,800 for complete removal. This is when you need to know how much does it cost to re-insulate an attic fully.
Clean and dry (no contamination, moisture, or pest signs)
Structurally intact (hasn’t compressed significantly)
Adequate base (R-15 to R-25 can support top-off to R-38+)
Air sealing feasible (can seal gaps without disturbing old insulation)
Top-off costs: $2–$3/sq. ft.
20–30 years for properly maintained insulation. Replace sooner if rodent activity, roof leaks, or severe compression. LA’s dry climate extends life, but extreme summer heat gradually degrades materials.
Watch for: uneven room temps (upstairs 10°F+ warmer), AC runs constantly, high bills ($250–$500+ monthly), dusty vents, visible thin spots (less than 6″ depth).
Any time—LA’s climate allows year-round installation. Fall/spring are most popular (2–3 week scheduling). Winter has faster availability. Summer requires early-morning work but some offer off-peak pricing. Don’t wait—12–24 month payback makes any season worthwhile.
Yes. There is $1,200/year for R-38+ insulation in existing homes. California utility rebates (LADWP, SoCalGas, SoCal Edison) offer up to 0.75 cents per sq ft depending on the program.
Atticare confirms current eligibility during consultation and prepares all paperwork.
LA homeowners save 15–25% on cooling, 10–15% on heating—$600–$1,800 annually for 1,500–2,000 sq. ft. homes. Payback: 12–24 months.
Ask Atticare to check LA-area rebates and include them in your quote.
Many homeowners wonder how much does it cost to insulate an attic if they do it themselves versus hiring professionals.
Possible but risky. DIY saves $500–$1,000 on labor but risks missed air sealing (lose 30–50% savings), improper baffles (moisture damage), safety hazards (heat, falls, electrical), no warranty, and equipment rental ($200–$400).
DIY mistakes cost $1,000–$3,000 to fix plus $500–$1,500 annual energy waste. For dirty attics or removal projects, hire licensed professionals. See crawlspace insulation DIY mistakes for similar pitfalls.
California allows unlicensed work under $500 total. Most insulation exceeds this, requiring C-2 or B license. Unlicensed handymen lack insurance, code knowledge, and warranty protection—use licensed contractors.
$2.50–$3.5/sq. ft. for blown-in in clean attics. But many skip comprehensive air sealing or sanitization. Compare scope carefully—$500–$1,000 upfront savings may cost $1,500–$3,000 in lost efficiency over 3–5 years.
Short-term cheap ≠ long-term value. False economy: saving $1,000 upfront with cheap installation costs $500–$1,500 annually in wasted energy. Over 5 years, “cheap” becomes $2,500–$7,500 more expensive. Choose mid-range bid with best scope and warranty.
Book Atticare’s free consultation to benchmark quotes apples-to-apples.
12–60 month terms with competitive rates (often 0% APR promotional). Quick approval, no prepayment penalties. Check current offers.
Example: $5,000 project at 5.9% APR over 36 months = ~$150/month. Energy savings of $75–$125/month offset 50–80% of payment.
Insulation + Attic Cleaning: Save 10–15%
Insulation + Rodent Proofing: Seal entry points, save $200–$500
Insulation + Radiant Barrier: Ultimate summer comfort, 10–20% discount
✅ Off-season scheduling (5–10% winter discounts)
✅ Referral credits ($50–$100)
✅ Scope clarity via photos (avoid unnecessary removal)
✅ Tax credits + rebates (recover 20–30% of costs)
Don’t cheap out on: Air sealing, baffles, or licensed contractors.
Ready to plan your budget? Here’s how to determine how much does it cost to insulate an attic for your specific project:
Step 1: Decide Scope
Free inspection with photos determines: top-off
Step 2: Choose Material
Most LA homes: blown-in fiberglass to R-38 Sound dampening near freeways: cellulose. Targeted problem spots: spray foam surgically.
Step 3: Demand Line-Item Estimate
Must include: material/R-value, air-sealing hours, baffle count, bag counts, removal/disposal, cleanup, warranty, schedule.
Step 4: Check Incentives
Federal IRA (30% back, max $1,200/year) + California utility rebates ($100–$500) + Atticare financing/bundles.
Step 5: Compare & Schedule
Get two line-item bids, compare scope (not just price), choose best value, schedule same-week with Atticare.
1,000 sq. ft.: $2,500–$4,500 | 1,500 sq. ft.: $3,500–$6,500 | 2,000 sq. ft.: $4,500–$9,000+
Depends on scope. Clean top-off: $1.50–$2.50/sq. ft. Full remediation: $2.50–$4.50/sq. ft.
See square footage ranges above. Always demand line-item estimates showing air sealing, baffles, material specs.
Same as new installation if topping off. Add $1.50–$3.00/sq. ft. if removal required.
See spray foam section above—$8,000–$18,000 for 2,000 sq. ft. closed-cell spray foam. That’s 2–3× more than blown-in alternatives which cost $3,000–$6,000 for the same space.
Most LA homeowners invest $3,500–$6,500 for 1,500 sq. ft. with comprehensive scope.
$2.50–$4.50/sq. ft. depending on removal needs, air sealing, and target R-value.
Blown-in for most LA attics—fills gaps, faster install, better coverage.
Not for most LA attics. Spray foam costs 2–3× more with minimal added benefit.
Remove if contaminated, damaged, or wet. Top off if clean, dry, and intact. Request both options with photos.
Yes. Federal IRA: up to 30% (max $1,200/year). California utilities: $100–$500 rebates.
Possible but risky. DIY saves $500–$1,000 but mistakes cost $1,000–$3,000 to fix plus ongoing energy waste.
Not recommended. Most projects require C-2 license. Unlicensed work lacks insurance, code knowledge, warranty.
R-38 (LA standard): 12–14 inches blown-in. R-30 (coastal): 10–11 inches. R-49 (high-performance): 15–17 inches.
Yes. LA summer attics hit 130–150°F. Insulation reduces cooling costs 15–25%.
Avoid: over non-IC-rated lights, blocking soffit vents, covering electrical boxes, around furnace flues.
Any time. Fall/spring most popular. Winter has faster scheduling. Don’t wait—12–24 month payback makes any season worthwhile.
$1.50–$3.00/sq. ft. but often skips comprehensive air sealing. Compare scope carefully.
Yes. 15–25% lower bills, 12–24 month payback, steady temps, less HVAC wear, higher resale value.
Removal: $1.50–$3.00/sq. ft. Reinstall: $1.50–$2.50/sq. ft. Total: $3,000–$11,000 for full remediation.
Still wondering how much does it cost to insulate an attic in Los Angeles? Los Angeles homeowners deserve transparent pricing and quality work. Atticare delivers upfront, line-item estimates within 24–48 hours—no surprises.
Why Atticare:
Get your free Atticare line-item estimate today—transparent pricing, honest recommendations.
Atticare: Serving Los Angeles County with trusted attic insulation installation, removal, air sealing, and ventilation. Licensed (C-2), insured, and committed to your comfort and savings.

| Condition | Signs | Action |
| Clean & Simple | Dry insulation, no droppings, easy access, just thin (4–6″) | Air-seal gaps + add batts to hit R-38 |
| Mixed | Uneven coverage, some rodent history, dusty or compressed batts | Remove problem areas + sanitize + air seal + new batts |
| Full Remediation | Wet or dirty insulation, bad smells, rodent feces, wiring worries, major damage | Full removal + sanitize + air seal + fix ventilation + new R-38+ |
| Type | Best For | Pros | Cons | LA Notes | 2025 Pricing (R-38) |
| Fiberglass Batts | Most LA homes, especially with rodent history | Clean installation, easy access, serviceable, doesn’t settle | Requires careful fitting | Recommended for 99% of LA attics | Low: $3.91/sq ft Mid: $4.60/sq ft High: $5.06/sq ft |
| Blown-in Fiberglass | Homes without rodent concerns or future access needs | Fast coverage, fills irregular spaces | Very dusty, cannot re-enter for service, settles 10-15% | Problematic for 95% of customers | Low: $3.74/sq ft Mid: $4.40/sq ft High: $4.84/sq ft |
| Blown-in Cellulose | Soundproofing needs, no future access | Eco-friendly, good sound dampening | Very dusty, heavier, settles more | Only if no rodent service needed | Low: $3.66/sq ft Mid: $4.30/sq ft High: $4.73/sq ft |
| Spray Foam | Targeted spots only | Air seal + insulation at once | 2-3× more expensive, complex codes | Use surgically, not whole-attic | $6.50-$8.50/sq ft |
Atticare: Serving Greater Los Angeles and Orange Counties with trusted attic insulation installation, removal, air sealing, and ventilation. Licensed, insured, and committed to your comfort and savings.